Frugal Friday: Meal Planning Made Easy

sticky-paperRaise your hand if you dread weekly meal planning!

My hand would have been raised until recently when I devised a system that has completely changed my meal planning game. I share this in case someone out there just might profit from what has helped me immensely!

I used to sit with my sales ads in front of me, along with cookbooks and my recipe cards trying to figure out what I felt like making, what was on sale, what was healthy, what new recipes I wanted to try out, what my family would like. . .

My husband, though, would frequently comment about the meals we all loved: “You know, you could make this every week, and I wouldn’t mind.” After almost 8 years of his saying this, I finally took his words to heart and made myself a monthly schedule. Obviously, if you live with people who don’t like routine meals, this isn’t going to work for you. But this has been a huge time-saver for me, as well as minimizing a task I used to dread. As an added plus, I think my young kids actually benefit from the routine, as they generally know what to expect.

I have some open meal slots, as I do enjoy trying out new recipes, or throwing in something that is not as frugal or healthy as our usual. I initially started out planning just dinners, but I liked the idea so much that I plan our lunches too. My wonderful husband makes breakfast, so I don’t even have to worry about that, although he makes the same meals on certain days of the week too.

Here’s our basic weekly schedule:

Monday:

B-Cereal

L-Leftovers (AKA empty the fridge, because I will shop that night)

D-Open

Tuesday:

B-Smoothies

L-Leftover from dinner (or egg salad if no leftovers)

D-Salad

Wednesday:

B-Smoothies and eggs

L-Baked potatoes with broccoli

D-Pizza & veggies (Aldi’s large deli pizzas are delicious and only $5.99)

Thursday:

B-Smoothies and eggs

L-Sandwiches & veggies

D-Mexican (I have 4-5 different meals I plan on for each week of the month. Every other week I cook a big crockpot of refried beans to use with this meal and others.)

Friday:

B-Cereal

L-Leftover Mexican

D-Breakfast/vegetarian (I have 2 breakfast meals and 2 vegetarian meals I plan on)

Saturday:

B-Pancakes

L-Refried bean dip (from Thursday’s meal)

D-Crockpot meal

Sunday:

B-Waffles

L-Saturday leftovers

D-Cheese quesadillas

We have reasons for doing some of our meals the way we do. Wednesday nights we meet with our church for prayer, so pizza reduces the stress. Thursday nights are our family fun night, and we all love Mexican–and I often make a dessert too. Sundays we have church, and because my husband is the pastor, they tend to be crazy or stressful, so we like to keep it simple.

I can’t stress enough how much of a help this has been to me. I hope it can help one of you too! Stay tuned in future “Tasty Tuesday” posts for a few of my regular recipes for extra inspiration.

Happy stress-free meal planning! 🙂

{On Fridays, I attempt to pass along a frugal tip I have learned or am attempting to learn. I love a good deal, and I love to help our family stay within the budget by being frugal in every area of life!}
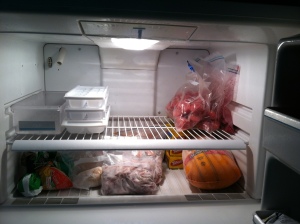


Frugal Friday: Filling the Freezer for Post Baby, Part 3

297The past couple weeks I posted parts 1 and 2, each listing 10 recipes that I made to fill my freezer with meals to eat after my third baby was born. Here are some more of the recipes I made. Again, I’ll star my absolute favorites that I know I’ll make again.

  1. *Homemade Pizza

These are delicious, easy, and frugal–not to mention much healthier than store-bought frozen pizzas! I make my own crust, using this simple no-rise dough. I also make my own sauce, using this delicious and easy sauce recipe. I often make double the pizza when we have pizza and follow these simple instructions to parbake and freeze one of the pizzas. Delicious and easy!

  1. *Slow Cooker Italian Beef 

Another delicious and easy winner! Techinally, you don’t really freeze this meal, unless you have a roast that you bought on sale and froze. I also definitely recommend the baked potato wedges recommended at the end of the recipe. Delish!

  1. Freezer egg sandwiches using homemade sausage patties.

I will not make these again. The homemade sausage was good and maybe I’ll make that (but I would cut them in patties before freezing next time!). It was quite a bit of work for the quantity I made, and I did not care for the way they reheated. The English muffins were soggy and the eggs were kind of spongy. Oh well, live and learn. . .

  1. *Instant Oatmeal 

So simple. If you buy instant oatmeal packets, just stop! 🙂 This is so much cheaper and healthier. Not to mention really easy.

The following are some side dishes I made as well.

  1. *Homemade Salsa (whichever is your favorite!)

After blending, simply place in freezer bag container or bag and freeze.

  1. Twice baked potatoes 

These were fine, but I thought the work outweighed the convenience factor.

  1. Cheesy potato skins 

If you do make #6, though, do make these. 🙂 They were good.

  1. Sweet Broccoli Pasta

Confession: we still have this in the freezer. We did not care for this when we made it. It was just weird to have sugar in a pasta dish.

  1. Southwest Rice and Beans

This a great, delicious side dish. I just didn’t care for it after frozen. It’s so easy anyway (especially if you have rice in the freezer) to just throw together–I just make it fresh.

  1. Spiced Roasted Cauliflower 

This was good. I just prefer to use whatever fresh veggies are in season, though.

Hope these lists are a help. Happy cooking and freezing! 🙂

{On Fridays, I attempt to pass along a frugal tip I have learned or am attempting to learn. I love a good deal, and I love to help our family stay within the budget by being frugal in every area of life!}
Frugal Friday: Filling the Freezer for Post-Baby, Part 2

297Last week, I posted part 1, listing 10 recipes that I made to fill my freezer with meals to eat after my third baby was born. Here are some more of the recipes I made. Again, I’ll star my absolute favorites that I know I’ll make again.

  1. *Slow Cooker Party Pork 

This was another easy, tasty, inexpensive favorite. And–no lie–when I asked my husband what he thought of this dish, he (not knowing what it was called) said, “It’s like having a party in my mouth.” 🙂 So, there you have it. . .

  1. *Bean and Cheese Burritos

These are great to have on hand for anytime! I used this method to wrap and freeze the burritos, but I used this homemade refried bean recipe instead of canned, along with a little cheese. People, you have got to try these refried beans; you will never go back to canned again. They are so inexpensive and easy to make, not to mention absolutely delicious!! One of the easiest ways I found to make up a bunch of these burritos is to assemble them right after making a fresh batch of these refried beans (letting them cool before wrapping, of course). These refried beans also do freeze well on their own in a freezer container or bag.

  1. *Chicken, Broccoli, Cheese Casserole

Another delicious winner! This is a great one to double and eat one for dinner and have one for the freezer. The second time I made this, I halved the topping (only 1 sleeve of Ritz and ½ stick butter), because I thought the original recipe called for too much.

  1. *Homemade Chicken Nuggets

We loved these! For most recipes calling for chicken, I just buy a whole chicken, because it’s a lot cheaper. This recipe, though, is a great one if you find a good deal on boneless, skinless chicken breasts. Because you freeze them after you bake them, they are super easy to just reheat in the microwave.

  1. *Creamy Chicken Enchiladas

This is my go-to recipe for enchiladas. We love them! I doubled them one night, so I could freeze 1 pan. I froze them assembled. When ready to eat, I thawed overnight then baked as directed.

  1. *Baked Ziti 

This was good and easy to assemble. Great way to use ground beef if you bought some in bulk on sale.

  1. Cheesy Vegetable Chowder

This was pretty good. I might make it again, but I would definitely experiment with the cheese. I’m not a huge fan of Velveeta (or velveeta-like cheese; I used Aldi’s brand), but I’m guessing that’s what gave it the creamy texture. I think I would try half velveeta and half cheddar.

  1. Crockpot Orange Chicken

This was really easy, but we just weren’t a huge fan. My husband and I both like Chinese food, but homemade just never seems to meet our expectations.

  1. *Cheesy Potatoes and Ham

 Definite winner! As long as you’ve got some leftover ham, this is so incredibly simple and delicious.

  1. Slow cooker Beef and Mushrooms 

To be honest, I don’t remember much about this recipe. It was easy, and I don’t remember hating it, but I don’t remember loving it either. I didn’t star it on my own list as a “make again” recipe. It may be because it calls for ½ cup of apple juice, which I don’t normally buy, and I don’t think I’d buy apple juice just to make this recipe again. But feel free to try it for yourself–you might love it! 🙂

Next week, I’ll post part three.

{On Fridays, I attempt to pass along a frugal tip I have learned or am attempting to learn. I love a good deal, and I love to help our family stay within the budget by being frugal in every area of life!}

Frugal Friday: Filling the Freezer for Post-Baby, Part 1

297When I was pregnant this past summer with my youngest, Ashlyn (now 6-1/2 months!), I decided I was going to make post-baby meals ahead of time to make life easier. It took a lot of work and planning, but it was really nice to have a freezer full of over 30 meals to choose from. I kept a list of these meals on the fridge with the date made, use-by date, defrosting instructions, and preparation instructions. I also later painted my deep freezer with chalkboard paint for easier inventory.

There were many recipes that I will definitely make again and some that I won’t for various reasons. I thought I’d pass along over the next few weeks the recipes I tried with just a few comments as to my opinions. The easiest way I found to prepare these meals was to simply double up a recipe, using one for dinner that night and one for the freezer. If I found a cut of meat (especially roasts) on sale, I would buy a couple and throw them in a freezer bag with whatever else I wanted.

For what it’s worth, Aldi freezer bags worked fine. The only thing you want to make sure is that you have a good way to organize your deep freezer. I’m still working on that. A couple bags did get ripped because I was digging around looking for something.

Here are some of the recipes I did make. I’ll star my absolute favorites that I know I’ll make again.

1. Brown Sugar Meatloaf 

This was really good, and my husband liked it. This is a great meal to double and freeze half. I just love my mom’s recipe for meatloaf, though (even though my husband thinks it’s too saucy). I will make this again if I plan on freezing meatloaf. If I plan on just having it for dinner I’ll make my mom’s (which is the best meatloaf ever!) 🙂

 2. *Burritacos 

Yummy! This one is already doubled within the recipe, easily allowing you to freeze one for later. I would either exchange the pepper jack cheese with monterrey jack or do half-and-half, because it was a wee bit too spicy for my fam.

 3. Chicken pot pie

This was really good, and I like the fact that the sauce is homemade (i.e., no canned condensed soup). I might make it again for dinner, but not freeze it. For some reason, it didn’t taste as good to me the second time around, but that might just be me. . .

 4. Mexican stuffed shells

I really liked these and would totally make them again, but they were not my husband’s favorites. He absolutely loves Mexican, and it was a desecration in his mind to mix Mexican with pasta. 😉 I don’t think I actually froze any of these, but I totally would have if Dave liked them.

 5. *Breakfast Burritos 

These were great! I am definitely going to do these again. I think we actually have a few left over still (and they still taste good).

 6. Shepherd’s Pie

Again, this was a really good one, but it was not my favorite after frozen. Not quite sure why. This is also another one, where I love my Mom’s a little better. But, this was super tasty fresh!

 7. Chicken Pesto Calzones 

We were not a fan of these, but it could have been the pesto I used. I also didn’t use grilled chicken breasts (just chicken from a whole cooked chicken).  I may try it again with different filling. Pesto is not for everyone.

 8. *Sausage Spinach Tomato Soup 

Delicious, easy, and pretty healthy. The first time I put the whole pound of ditalini pasta in, and it was too thick, in my opinion (though my husband liked it that way). The second time, I used half a pound, and that is what I would probably do again.

 9. *Slow Cooker Cranberry Pork Roast 

This is definitely one of my favorites! So easy and delicious. Bone-in pork roast is really cheap too. This is one where you can buy several roasts on sale or reduced-price and have a few easy to prepare and cook recipes in the freezer.

10. *Slow Cooker Turkey and Black Bean Chili 

 Delicious, healthy, and easy.  Another good one to double/freeze half.

Next Friday, I will try to post part two. Do you have any tried-and-true freezer recipes that I could add to my to-try list?

{On Fridays, I attempt to pass along a frugal tip I have learned or am attempting to learn. I love a good deal, and I love to help our family stay within the budget by being frugal in every area of life!}

Frugal Friday: Amazing Pre-Reading Program for Preschoolers!

ImageI wanted to take a post to share about a program that I have been using with my son, Calvin (4 next month) for about a year. The company is called All About Learning Press. I am currently using their All About Reading Pre-reading curriculum, and I love it.

Our Story

I started using the curriculum right after Calvin turned 3. Initially, I attempted doing it 3 days a week with him. Although he did fine with the letters themselves, he wasn’t quite ready for some of the other activities, like rhyming and such. I backed down to maybe one lesson a week, until I saw that Calvin was really starting to grasp rhyming and the other concepts. Several months ago, it seemed like something just clicked in his brain, and he suddenly started rhyming all the time. He has also started recognizing the sounds that letters make. (For example, outside of a lesson, he will see a dog and say, “Dog and jog rhyme!” Or he will say, “d-d-dog. . . dog starts with d!”). So, we are back to 3 days a week now.

The Program

What I really love about this program is the way it is set up. The website for pre-reading states:

Your student will learn five very important pre-reading skills: Print Awareness, Phonological Awareness, Letter Knowledge, Listening Comprehension, and Motivation to Read. These skills lay the foundation for learning to read. Below is a sampling in each area.

Letter Knowledge

Learn to recognize capital letters
Learn to recognize lowercase letters
Learn to recite the alphabet song

Phonological Awareness

Learn to blend sounds orally to make a word
Learn to clap syllables
Learn rhyming and word boundaries
Identify the beginning and ending sounds in a word

Print Awareness

Understand that the words on the page can be read
Understand that books are read from cover to back, and sentences are read from left to right

Listening Comprehension

Answer simple questions about a story
Learn to retell a story in his own words
Ask pertinent questions about a story

Motivation to Read

Cultivate an enthusiasm for learning
Instill a delight for books and reading
Observe situations in which reading is beneficial
Establish a desire to learn to read and write

The Cost

The deluxe package is obviously the most expensive at $119.95 (+ S&H, I think). This includes all the basics including a lot of extras, like a puppet, a bag to carry everything in, stickers, etc. You can see all what is included at the link I posted above.

The basic package is $79.95 (+ S&H, I think). This includes the basics (obviously).

I wanted to cut costs a little bit more, so I will share what I bought, which has worked well for us:

  • Teacher’s Manual-$22
  • Student Packet-$24.95
  • Divider Cards-$4.95
  • Total-$51.90 (+ S&H, I think)

Because I didn’t buy everything in the packages (like the two rhyming books, the activity box, and Ziggy the Zebra puppet), I did have to make a few small modifications. I have a couple books of kids poems, and I would just use a poem that had a capital A in the title if we were studying the letter A. Not difficult (except for X :)). Instead of the activity box, I bought a good ol’ index card file box–works great. And instead of Ziggy the Zebra who always plays the learning activities with your child, I used what I had–Mr. Snaky the Snake! Easy enough, AND it saved me almost $30!

Plus, when I use this program for Mackenna in the future, the only thing that I will have to buy is the Activity Book (Calvin’s was included in the Student’s Packet) for $16.95!

You can clearly see that I love this program. Calvin enjoys it too, and even Mackenna (just-turned-2) can already sing basically the whole alphabet! I highly recommend this program, and I would encourage you to consider it for your preschoolers.

{On Fridays, I attempt to pass along a frugal tip I have learned or am attempting to learn. I love a good deal, and I love to help our family stay within the budget by being frugal in every area of life!}

Frugal Friday: Easy, Inexpensive DIY Canvas Wall Art

canvas wall art 2Let me start out this post by stating that I am not very crafty and certainly not creative. When I search Pinterest for a specific idea, I look for projects that are very simple, inexpensive, and non-time-consuming. I usually end up modifying things to make the project even easier and cheaper!

My first canvas project was a fail. I kick myself every time I think of it, because of the time–but especially the money!—wasted. I cut out and decoupaged (the fancy term for what I call “mod-podged,” but usually end up saying “modge-podged”!) a huge map of the world to various canvases for wall art in our living room. If my husband and I didn’t have perfectionistic tendencies, and if we weren’t planning on displaying it in the main room where we “entertain,” it probably would have been fine actually. But there were just enough bubbles and wrinkles on it to drive us crazy. I kept the first map on canvas intact, but the second map (thinking I had figured out how to fix the bubbles) was vehemently torn off the canvas in frustration. I might actually put the intact map up in our basement.

All that to say. . . I am not naturally crafty. However, since I did have that second set of canvases, I thought it wouldn’t hurt to try to redeem them, especially if I wasn’t losing any money on it.

To make room for the new baby coming this summer, we moved my daughter out of the nursery into another bedroom. I wanted her to have something cute above her new toddler bed, but I didn’t want to spend a bunch of money. So I browsed pinterest. I stole bits and pieces of ideas from this post and that. I took out my ruined, map-torn-off canvases and my mod podge. I found some cute scrapbook paper that I had lying around. I free-handed some letters onto more paper (because I wasn’t going to spend the time or money on silhouette machines, stencils, etc), and I created wall art!

This is not a tutorial, but I will explain what I did, in case anyone wants to give it a try.

  1. I first figured out which scrapbook papers I wanted on which canvases, and what arrangement I wanted the canvases to be on the wall. I used one 16×20” and four 8×10” canvases. I think most of my scrapbook papers were about 12×12 (I used 8). Some of them had curvy edges, which looked nice on the large canvas.
  2. Working on one canvas at a time, I coated the top and sides with a thin layer of mod podge (matte), using one of those cheapo foam brushes. I waved a piece of paper over it a few times to let it dry just a tad, then I centered my scrapbook paper on top. I folded the edges of the paper over the edge of the canvas. I found that the mod podge on the edges of the canvas wasn’t strong enough to hold the scrapbook paper (the thicker the paper the better, I also found), so I stapled the paper to the wooden frame on the back of the canvas.canvas wall art 3
  3. Once all of the papers were glued on and dry, I then applied another thin layer of mod podge to the top and sides of the large canvas.
  4. I used a straight edge to free-hand the letters of the word love. I used mod podge to adhere each letter to each of the small canvases. Then, I applied a thin layer on top of the small canvases.
  5. Once completely dry, I applied another thin layer of mod podge to all of the canvases. Interestingly, the second layer really smoothed things out. There are still a few tiny bubbles or wrinkles, but they are hardly noticeable. The thicker the paper, the less bubbling and wrinkling.

ImageI was so excited to see how well this turned out. It looks super-cute above her bed. I keep staring at it, because I am in disbelief that I was actually crafty! 🙂 This project was so easy, in fact, I think I’m going to have to try another. I’m thinking about doing a book page-covered one or perhaps even a music-sheet canvas. We’ll see. . .

{On Fridays, I attempt to pass along a frugal tip I have learned or am attempting to learn. I love a good deal, and I love to help our family stay within the budget by being frugal in every area of life!}

Frugal Friday: Paint the Top of Your Chest Freezer with Chalkboard Paint!

ImageOne of the items that has helped me save money is my chest freezer. Sadly, mine started randomly thawing and is now kaput! 😦 Talk about major bummer when you open your freezer to see all the food thawing/thawed. Thankfully, my supply was running low as I planned on filling it back up next month with freezer meals for the new baby in August.

Because they are so useful, however, we will be buying another one. Buying meats on sale, freezing your own fruits and veggies, making freezer meals–all ways in which one can save money!

The bigger your chest freezer, though, the easier it is to forget what is deep down inside. Initially, I thought of making a list next to my freezer. But then, I thought of something even better–chalkboard paint!

This is not a tutorial by any means, but I will tell you what I did. First, I lightly sanded the top. This was probably mostly necessary, because our chest freezer was used and had a little rust on it. Then, I primed the top with Rustoleum’s primer for aluminum or galvanized metal (clearance at Lowes). I then applied a thin layer of chalkboard paint. I used a foam roller for that. I have found (in my extremely limited chalkboard paint experience) that a foam roller applies the paint very smoothly to allow for easier writing. Once completely dried, I applied another coat of chalkboard paint. I may have done a third, but I don’t remember (Sorry! Preggo brain! 🙂 )

Now, every time I added an item, I could just add it, along with the date, to my list right on the freezer itself. When I removed an item, I could just erase it. Super simple, plus it covered up any rust spots, making it much more attractive in my opinion!

Alrighty then. . . Anybody selling a chest freezer?? 😉

{On Fridays, I attempt to pass along a frugal tip I have learned or am attempting to learn. I love a good deal, and I love to help our family stay within the budget by being frugal in every area of life!}

Frugal Friday: A Free Gift at Great Cost to the Giver

ImageToday is Good Friday, the day in which we remember the death of our Lord Jesus Christ. While many of varying religions may recognize the brutality of the physical death of Jesus, they often miss the significance of that brutal death.

Jesus suffered far more than physical pain. Charles Spurgeon, in his morning devotional, wrote these words to remind us of the great cost Jesus’ death on the cross was to our Savior:

We here behold the Saviour in the depth of his sorrows. No other place so well shows the griefs of Christ as Calvary, and no other moment at Calvary is so full of agony as that in which his cry rends the air-“My God, my God, why hast thou forsaken me?” At this moment physical weakness was united with acute mental torture from the shame and ignominy through which he had to pass; and to make his grief culminate with emphasis, he suffered spiritual agony surpassing all expression, resulting from the departure of his Father’s presence. This was the black midnight of his horror; then it was that he descended the abyss of suffering. No man can enter into the full meaning of these words. Some of us think at times that we could cry, “My God, my God, why hast thou forsaken me?” There are seasons when the brightness of our Father’s smile is eclipsed by clouds and darkness; but let us remember that God never does really forsake us. It is only a seeming forsaking with us, but in Christ’s case it was a real forsaking. We grieve at a little withdrawal of our Father’s love; but the real turning away of God’s face from his Son, who shall calculate how deep the agony which it caused him?

In our case, our cry is often dictated by unbelief: in his case, it was the utterance of a dreadful fact, for God had really turned away from him for a season. O thou poor, distressed soul, who once lived in the sunshine of God’s face, but art now in darkness, remember that he has not really forsaken thee. God in the clouds is as much our God as when he shines forth in all the lustre of his grace; but since even the thought that he has forsaken us gives us agony, what must the woe of the Saviour have been when he exclaimed, “My God, my God, why hast thou forsaken me?”

At lunch today, I was reviewing with my 3-year old son, Calvin, what Good Friday meant, how Jesus was beaten, mocked, carried the cross on his back, then crucified. We talked about how our hearts are black with sin, and Jesus took our black hearts when he died on the cross. And He gave us his white heart. Freely given. At great personal cost.

What a Savior!

If you are burdened by the weight of your sin and would like to learn how to have peace and rest, found in Christ alone, I encourage you to read this. I am also more than happy to answer any questions if you contact me through the comments section below.

{On Fridays, I attempt to pass along a frugal tip I have learned or am attempting to learn. I love a good deal, and I love to help our family stay within the budget by being frugal in every area of life!}


Frugal Friday: Gathr ~ A Company that Gives You Products!

girl with shopping bag


A friend recently introduced me to Gathr. When I first read what she “bought” for $20/month, I thought it sounded too good to be true. After looking into it and asking a bunch of questions, though, it sounds like a great deal.

Here’s a summary of what it is and how it works. Gathr offers bundle packages, pre-packaged or custom made, that you buy for a set amount a month. These packages include great products like:

  •          $10 Amazon Gift card/month
  •          $10 Living Social credit/month
  •          $10 Target Gift card/month
  •          $10 Toys ‘R’ Us gift card/month
  •          Ad-free Pandora subscription
  •          Shop-Runner subscription (free 2-day shipping at certain retailers)
  •          Identity theft, malware protection
  •          Magazine subscriptions (National Geographic and more)
  •          And so much more!

I wanted to package my own for $20/month, so I was given 3 choices + a monthly bonus + cash back at priceline.com. I chose the $10 Amazon gift card (monthly bonus), $10 Target gift card, $25 Restaurant.com e-gift card, and online subscription to Consumer Reports ($6.95 value).  So, for $20/month that I pay, I get $51.95 worth of products/gift cards!

Now, would I regularly subscribe to Consumer Reports or even buy monthly restaurant.com certificates? No. . . but that is a “bonus” beyond  the $20 that I would spend at Target and Amazon.

The best part is that there is no expiration on the gift card codes. So, every month that I renew my subscription with Gathr, I just email or text myself my codes. For example, yesterday I opened my account, went to “My Stuff,” and redeemed my Amazon code. This simply put $10 credit, to be used any time, in my Amazon account. I also texted myself my Target code, and it was available on my phone to be scanned at Target (which I used yesterday, in fact, to get some AMAZING deals on diapers!).

Gathr promises no commitment and allows you to cancel at anytime. So far, I’m loving it! 🙂

If you’d like to give it a try, you can sign up here. This is my own referral link, which will give both you and me an additional (one-time) $10 Amazon gift card as a thank you if you join using my link!

Don’t you love it when companies give you products/money?! 😉

{On Fridays, I attempt to pass along a frugal tip I have learned or am attempting to learn. I love a good deal, and I love to help our family stay within the budget by being frugal in every area of life!}

Frugal Friday: Homemade Yogurt/Greek Yogurt {Made in Your Crockpot!}

yogurtWhen I first heard from a co-worker that you could make homemade yogurt, I was flabbergasted. I assumed it would require a lot of hard work and a bunch of ingredients. I was wrong.

It is so easy, and it is unbelievably cheaper than buying it–especially for the Greek yogurt. And it’s healthy. Can’t beat that! 🙂 I can’t remember where I found this exact recipe, but every recipe I’ve seen is a similar variation of this one.

Now, you do need yogurt “starter.” Basically, this is just some yogurt–bought or homemade–that has live, active cultures. I always use plain, full-fat yogurt for this, whether it’s store-bought or some of my leftover homemade yogurt. For every 4 cups of milk, use 2 tbsp of starter. Here’s the instructions:

Turn the crockpot on low. You can probably use any size, but my small one is perfect.

  • Remove your starter from the fridge.
  • Pour the amount of milk you’ve decided to use into a saucepan and heat over medium heat, stirring occasionally, until it reaches 185 degrees (use a candy thermometer). You’ll get the best results with whole milk, but I have combined whole and skim with no problem.
  • Once the milk reaches 185 degrees, remove the saucepan from the burner, cover, and  place pan in a sink ½-full of cold water.
  • Let milk cool, stirring occasionally until the milk lowers to between 90-110 degrees.
  • Measure yogurt starter into a bowl and pour 1 cup of the warm milk over it and stir together.
  • Pour the remaining milk into the crockpot, then stir in the starter/milk combination.
  • Put the lid on the crockpot, TURN IT OFF, and unplug. Wrap a heavy towel around the crockpot and let it sit for 6-10 hours.

For regular yogurt. . .

  • After the yogurt has set for 6-10 hours, place it in the fridge overnight without stirring. In the morning, you will have yogurt!

For Greek yogurt. . .

  • After the yogurt has set for 6-10 hours, place a cheesecloth over a strainer. Place the strainer over a bowl. Pour the yogurt into the cheesecloth-covered strainer.
  • Let the yogurt drain until the yogurt has reached your desired consistency.
  • Once finished draining, place the yogurt in the fridge.
  • The liquid that drains from the yogurt is called whey. This is a high-protein part of milk. We use ours in our fruit smoothies. There are many other uses for whey that I’ve heard of but never tried.

I try to save a few tablespoons of my homemade yogurt for my next batch. If you’ve done this a few times, you may notice that the yogurt starts to not thicken as much. If this happens, try buying some fresh yogurt for your next starter.

Although this is somewhat of an all-day recipe, the active time is very minimal. I love to eat this with fresh berries and homemade granola! 🙂

{On Fridays, I attempt to pass along a frugal tip I have learned or am attempting to learn. I love a good deal, and I love to help our family stay within the budget by being frugal in every area of life!}